Mood Board
Asset Environment Art
UV's
UV mapping is the 3D modelling process of projecting a 2D image to a 3D model's surface for texture mapping.
This process shows a texture map onto a 3D object/model, UV texturing allows polygons that make up a a 3D object to be painted in Photoshop, once you have made your texture, you bring it back into Maya and apply it to your model.
When a model is created a a polygon mesh, UV coordinates can be generated for each vertex in the mesh.
UV coordinates are texture's X and Y coordinates and always range from 0 to 1.
Within this space is where you unwrap your model so you can texture it, the larger the UV the better quality texture is applied to it, all the UVs have to be in this space so it can be textured.
Working with UV Maps:
UV mapping is the process of translating a 3D surface with volume and shape onto a flat 2D texture image. A way to visualise how that works is to consider and object that was wrapped as a gift, a UV map is similar to the careful unwrapping of the object and pressing the wrapping paper flat.
The actual execution of the UV mapping process requires some science and much art, but, like modelling, texturing or rendering, understanding the tools is an important part of understanding the process.
UV software:
There are many UV software's out there like:
Unfold3D

UVMapper
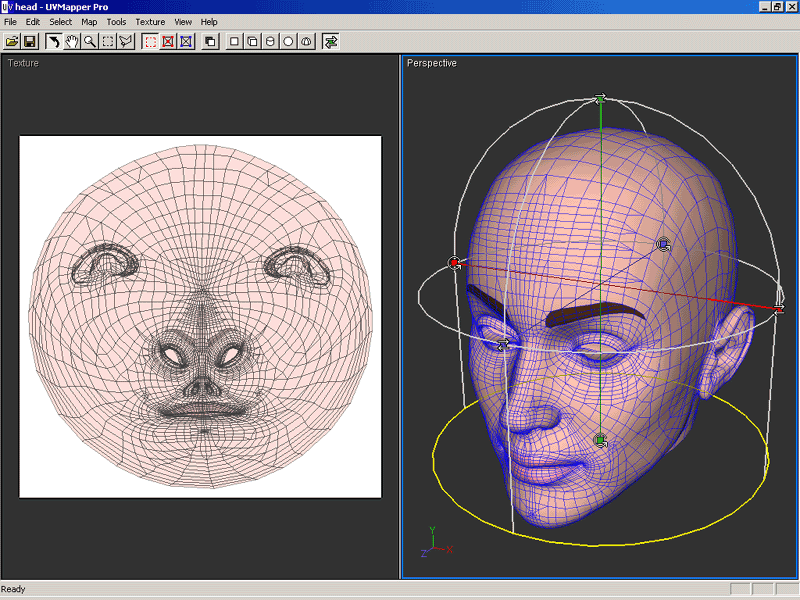
Ultimate Unwrap 3D
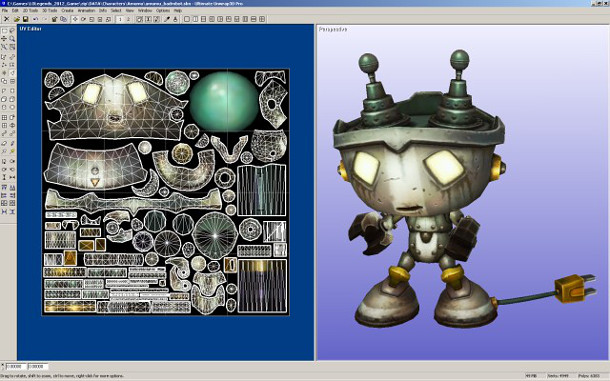
Cylindrical UV Mapping:
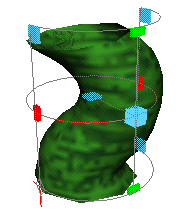
Cylindrical mapping creates UVs for an object based on a cylindrical shape that gets wrapped around the mesh. this projection is best for shapes which can be completely enclosed and visible within a cylinder, without projecting or hollow parts.
Spherical UV mapping:
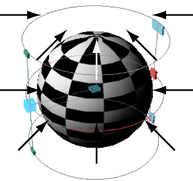
Spherical mapping create UVs using a projection that is based on a spherical shape wrapped around the mesh. this projection is best for shapes which can be completely enclosed and visible within a sphere, without projecting or hollow parts.
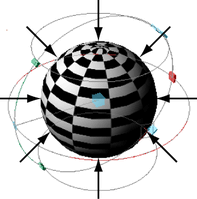
To create UVs using a spherical mapping technique.
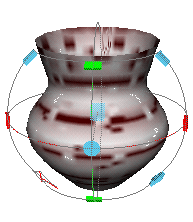
Automatic UV mapping:
Automatic mapping creates UVs for a polygon mesh be attempting to find the best UV placement by simultaneously projecting from multiple planes. This method of UV mapping is useful on more complex shapes where the basic planer, cylindrical or spherical projections do not produce UVs that are useful, especially on components that project outwards or are hollow in nature.
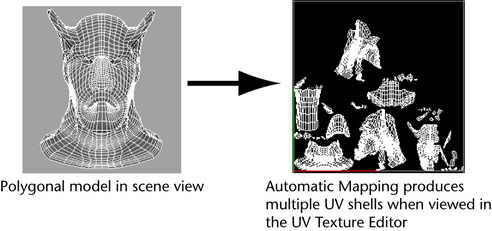
Automatic mapping creates several UV map pieces or "shells", this is fine if you are using tools that deal with UVs automatically for you, such as standard.
Fur and the 3D Paint tool in projection mode, if you need to work on the UVs manually, you will need to stitch the UV shells back together in the UV editor using the move and sew UV edges feature.
You can also specify user-defined planes for the projection of UV texture coordinates.
The Load Projection option uses a polygon object you specify from the current scene.
To facilitate more accurate UV projections a projection manipulator is displayed when using the automatic mapping feature, The projection manipulator lets you correlate the multiple planar UV projections that occur in the scene.
Texture Maps:
Texture mapping is where you apply an image to the surface of your polygon mesh, the application of patterns/colour to an 3 dimensional space (X, Y and Z) to give a realistic view of the surface of your mesh, texture maps correspond with the coordinates on a unwrapped UV so you can apply an image or painted graphics on Photoshop.
Specular Maps:
Specular maps tells the the modelling software what parts should be shiny and how much it should be, this can be useful for metals, a specular maps is a "grey scale" image and is a good idea for adding dents, scratches and imperfections.
How to UV with Maya:
To UV you need to select all the faces you want to UV after that select UV on the hotbar at the top then go to planar, the planar mapping options window opens and select the project and use the "Projection manipulator" to distribute UVs after that use the UV editor to view your UVs, to unfold the UVs you shift Right Click the selected UVs and select the "Smooth UV Tool" and drag your mouse on the Unfold option.
Texture and UV terminology:
Texture Mapping:
To create a surface that looks real, texture mapping is the process of adding imagery to your 3D model/mesh the image can be anything from a photograph to hand painted on Photoshop.
Shaders:
A Shader outlines the material on an object like how the light is reflected or how it is absorbed, shaders are used to give a 3D model and particular look with light.
UV mapping:
UV mapping is where you stretch a 3D model over a flat 2D image, each face on your mesh is tied to a UV map so you can place your 2D texture on your flat 3D mesh.
Specularity:
Specularity is how a surface reflects light, this is good for having metals shine but if you have concrete, it will have no light shining form it.
Normals:
Normal is a invisible line that points straight out from a polygon face, these show where the front is facing as well as the back, having the correct Normal orientation is important so when you render your model, it knows what way the front and back are facing,
How to use the Boonlean tool in Maya:
Boonleans in Maya let you take an object/polygon and subtract or add its "geometry" onto another object/polygon.
A Boonlean can only happen between two objects, the first selected polygon will be Boonleaned and the other will be added or subtracted however using the Boonlean tool can be very dangerous to your model.
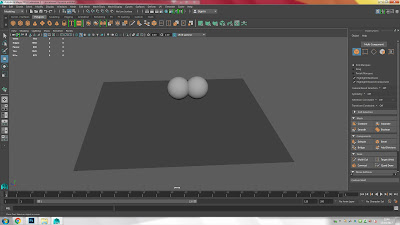
First you have 2 spheres.
Secondly you go to "Mesh" and select Boonleans.
Thirdly by selecting difference, this allowed me to subtract the first sphere from the other but where the two spheres were colliding, it subtracted the collision from the second sphere and gave it a crater.
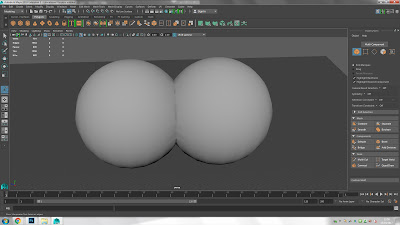
By selecting the "Union" option i attached the two spheres to each other.
By selecting the "Intersection" option it took away the parts of the two spheres that were not colliding and left the parts that were.
Action Plan
Research/Modelling/UVing/Textureing:
Week 1: Research
Week 2: Research
Week 3: Research and Start Modelling
Week 4: Modelling
Week 5: Modelling
Week 6: Modelling
Week 7: UVing
Week 8: UVing
Week 9: UVing
Week 10: Texture
Week 11: Texture
Week 12:Evaluation
Scene Breakdown:
Wood:
I will be using wooden walls and wooden logs in my model, so the texturing will be simple,
This will be the texture for half of my model.
Using wood means, that i will have to use fewer colours such as different shades of Brown and orange.
Here the wood can be used for walls, logs, the walkway and the beam at the top of the house.
Stone Foundation:
For the base of my model, it will be a stone foundation, this means that it will have to have jagged edges and rough surfaces.
The texturing will be bland and have very few colours to it, as well as the colour will have to be rough.
Thatch Roof:
The thatch roof will be fairly simple, the colour scheme i will be using will consist of lighter shades of brown.
Asset breakdown:
The logs will be made of a cylinder and will have a wood like texture.
The stone base will be made from a cube that will be scaled down and scaled up length ways as well as to extrude the bottom downwards to create the foundation of the lodge.
the roof will be a cube, scaled down and folded in the middle and put over the top of the lodge.
Time estimation:
The logs will take about 20 mins to do all of them and about 30 mins to UV and 1 hour to texture them.
The stone foundation will take 20 mins to model, 1 hour to UV and 2 hours to texture.
The roof will take 1 hour to model and 1 hour to UV both sides and 2 hours to texture both sides with thatch textures.
What is 3D modelling:
3D modelling is the process to create a 3D mesh to be put into a game or TV, 3D software generates models through:
1.) Simple polygons
2.) 3D primitives, Cubes, Cylinders or Spheres
3.) Curves
4.) NURBS
Once you finish your 3D model, you can begin to UV it, UVing can be difficult but to UV, you select what you want to UV and select the UV editor and unwrap/unfold your model, this allows you to put a "texture map" on it, this means you can put graphics onto your model, this can be a photograph or hand painted on Photoshop.
How is modelling for games different from modelling for films:
Firstly in games there is a polygon budget however in films/CGI there is not really any limit to this.
Poly-count break, is the amount of polygons that can be put into a single model, this has increased through the generations of consoles: PlayStation - PlayStation 4 for each generation the Poly count has greatly increased each time which means the models can look bigger and better, but for films it takes an average of 29 hours to render a single frame for animated films like "Monsters University" even though the graphics in games will always have limitations, films will not.
Hard Surface/Organic Modelling:
Hard Surface models are anything that is a machine or man made for example a helicopter or a computer however Organic models are the opposite, these are anything with flowing faces, Organic models will have smoother and more flowing shapes and few hard edges but for hard surface modelling there will be more hard edges
This helmet has very few flowing shapes and quite a lot of hard edges.
But not all man made models come under Hard surface models, for example a couch has smooth faces and is a organic model.
Environment Modelling:
Environment modelling is about assessing the environment you want to model and doing a breakdown of what there is and what your priming aim will be to model,
Modular Modelling:
Modular modelling is the use of "interchangeable components" in a model, for example a brick, you can make many different things with bricks.
Unique Modelling:
Unique modelling is the opposite to modular modelling, it is where you have a shape that cant be used to make other things.
High Poly/Low poly modelling:
Low poly is a polygon mesh that has a small poly count these occur in games and contrast with high poly, this is used in games as well as films/animations.
The appearance of a low poly model appears blocky.
High poly is the opposite of this, where there are a lot of polygons, this means the model/mesh will have a lot more detail
and this makes it more life like.
Different modelling software:
Maya
3Ds Max
DAZ Studio
Modo
ZBrush
3D Modelling Terminology:
Polygon Geometry:
polygons are used in all types of objects.
NURBS Surfaces:
NURBS stand for non-uniform rational b-spline, NURBS are commonly used for smoother objects that polygons cant be used for.
Subdivision Surfaces:
Subdivision are sometimes referred as NURMS, these are like polygonal geometry.
Beveling:
Beveling is a process where you turn an edge into a face so you can have a rounded corner instead of a sharp edge.
Pivot Point:
The pivot point is the point on a 3D object where you can rotate, scale or move it on the axis, the pivot point can be moved around where ever you want it to be, for example if the pivot point is on a door hinge the door will turn like it was a real door.
Target Meshes
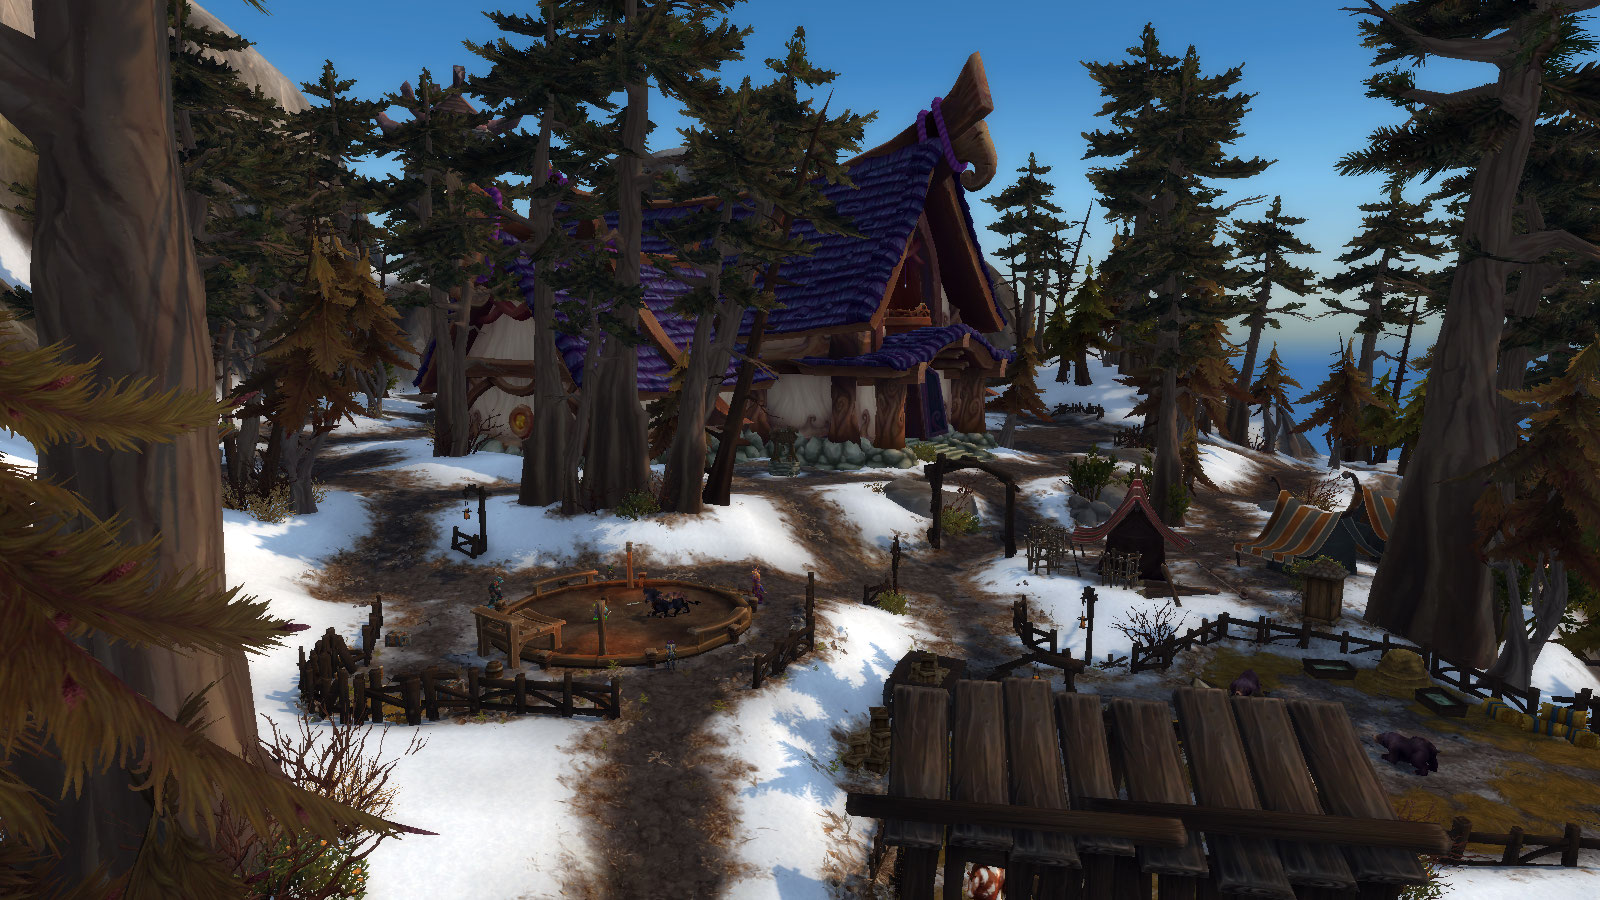
This is the Medieval lodge that i want to model.
This is my Maya piece, it is a medieval lodge, i got influenced from World of Warcraft, i picked this because it was not too big and still kept the interesting part while modelling.
I encountered many problems while doing this and the main problem was the roof
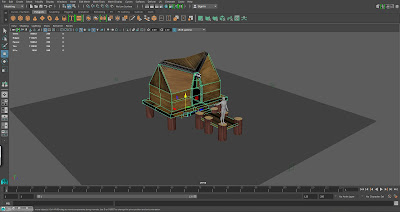
I added my textures on my log, i used a different colour scheme to everything else, the colour i mainly used was a dark shade of brown with a low opacity red shade.
Evaluation :
UV's
UV mapping is the 3D modelling process of projecting a 2D image to a 3D model's surface for texture mapping.
This process shows a texture map onto a 3D object/model, UV texturing allows polygons that make up a a 3D object to be painted in Photoshop, once you have made your texture, you bring it back into Maya and apply it to your model.
When a model is created a a polygon mesh, UV coordinates can be generated for each vertex in the mesh.
UV coordinates are texture's X and Y coordinates and always range from 0 to 1.
Within this space is where you unwrap your model so you can texture it, the larger the UV the better quality texture is applied to it, all the UVs have to be in this space so it can be textured.
Working with UV Maps:
UV mapping is the process of translating a 3D surface with volume and shape onto a flat 2D texture image. A way to visualise how that works is to consider and object that was wrapped as a gift, a UV map is similar to the careful unwrapping of the object and pressing the wrapping paper flat.
The actual execution of the UV mapping process requires some science and much art, but, like modelling, texturing or rendering, understanding the tools is an important part of understanding the process.
UV software:
There are many UV software's out there like:
Unfold3D

UVMapper

Ultimate Unwrap 3D

Cylindrical UV Mapping:
Cylindrical mapping creates UVs for an object based on a cylindrical shape that gets wrapped around the mesh. this projection is best for shapes which can be completely enclosed and visible within a cylinder, without projecting or hollow parts.

1.) Select the faces you want to project UVs onto.
2.) Select UV > Cylindrical Mapping.
3.) Use the manipulator to change the position and size of the projection shape.
4.) Use the UV editor to view and edit the resulting UVs.

Spherical UV mapping:
Spherical mapping create UVs using a projection that is based on a spherical shape wrapped around the mesh. this projection is best for shapes which can be completely enclosed and visible within a sphere, without projecting or hollow parts.

To create UVs using a spherical mapping technique.
1.) Select the faces you want to project UVs onto.
2.) Select UV > Spherical Mapping.
3.) Use the manipulator to change the position and size of the projection shape.
4.) Use the UV editor to view and edit the resulting UVs/

Automatic UV mapping:
Automatic mapping creates UVs for a polygon mesh be attempting to find the best UV placement by simultaneously projecting from multiple planes. This method of UV mapping is useful on more complex shapes where the basic planer, cylindrical or spherical projections do not produce UVs that are useful, especially on components that project outwards or are hollow in nature.

Automatic mapping creates several UV map pieces or "shells", this is fine if you are using tools that deal with UVs automatically for you, such as standard.
Fur and the 3D Paint tool in projection mode, if you need to work on the UVs manually, you will need to stitch the UV shells back together in the UV editor using the move and sew UV edges feature.
You can also specify user-defined planes for the projection of UV texture coordinates.
The Load Projection option uses a polygon object you specify from the current scene.
To facilitate more accurate UV projections a projection manipulator is displayed when using the automatic mapping feature, The projection manipulator lets you correlate the multiple planar UV projections that occur in the scene.
1.) Select a polygon object in the scene view that you want to project UVs texture coordinates.
2.) Select UV > UV editor to display UV editor or select the persp/UV Texture editor layout shortcut from toolbar to view the perspective view and the UV editor side by side.
3.) From the polygons menu set, select UV > Automatic
The polygon automatic mapping options window appears.
4.) Set the following options depending on your requirements:
Set the planes setting to the desired number of projections you require and click project. (The more planes you use, the less distortion in the UV layout but the more shells are created).
The automatic mapping projection manipulator appears centred about thr object in the view with the blue planes that corresponded to the planes setting.
5.) To move, rotate or scale the manipulator.
To move the projection manipulator in X, Y, Z drag any of the three coloured arrow handles while moving your mouse.
To rotate the projection manipulator, click the rotate handle to make the X, Y, Z rotate handles appear, dragging any of these rotates on the X, Y, Z.
6.) Use the UV editor to view and edit the resulting UVs.
Texture Maps:
Texture mapping is where you apply an image to the surface of your polygon mesh, the application of patterns/colour to an 3 dimensional space (X, Y and Z) to give a realistic view of the surface of your mesh, texture maps correspond with the coordinates on a unwrapped UV so you can apply an image or painted graphics on Photoshop.
Specular Maps:
Specular maps tells the the modelling software what parts should be shiny and how much it should be, this can be useful for metals, a specular maps is a "grey scale" image and is a good idea for adding dents, scratches and imperfections.
To UV you need to select all the faces you want to UV after that select UV on the hotbar at the top then go to planar, the planar mapping options window opens and select the project and use the "Projection manipulator" to distribute UVs after that use the UV editor to view your UVs, to unfold the UVs you shift Right Click the selected UVs and select the "Smooth UV Tool" and drag your mouse on the Unfold option.
Texture and UV terminology:
Texture Mapping:
To create a surface that looks real, texture mapping is the process of adding imagery to your 3D model/mesh the image can be anything from a photograph to hand painted on Photoshop.
Shaders:
A Shader outlines the material on an object like how the light is reflected or how it is absorbed, shaders are used to give a 3D model and particular look with light.
UV mapping:
UV mapping is where you stretch a 3D model over a flat 2D image, each face on your mesh is tied to a UV map so you can place your 2D texture on your flat 3D mesh.
Specularity:
Specularity is how a surface reflects light, this is good for having metals shine but if you have concrete, it will have no light shining form it.
Normals:
Normal is a invisible line that points straight out from a polygon face, these show where the front is facing as well as the back, having the correct Normal orientation is important so when you render your model, it knows what way the front and back are facing,
How to use the Boonlean tool in Maya:
Boonleans in Maya let you take an object/polygon and subtract or add its "geometry" onto another object/polygon.
A Boonlean can only happen between two objects, the first selected polygon will be Boonleaned and the other will be added or subtracted however using the Boonlean tool can be very dangerous to your model.
First you have 2 spheres.
Secondly you go to "Mesh" and select Boonleans.
Thirdly by selecting difference, this allowed me to subtract the first sphere from the other but where the two spheres were colliding, it subtracted the collision from the second sphere and gave it a crater.

By selecting the "Union" option i attached the two spheres to each other.
By selecting the "Intersection" option it took away the parts of the two spheres that were not colliding and left the parts that were.
Action Plan
Research/Modelling/UVing/Textureing:
Week 1: Research
Week 2: Research
Week 3: Research and Start Modelling
Week 4: Modelling
Week 5: Modelling
Week 6: Modelling
Week 7: UVing
Week 8: UVing
Week 9: UVing
Week 10: Texture
Week 11: Texture
Week 12:Evaluation
Scene Breakdown:
Wood:
I will be using wooden walls and wooden logs in my model, so the texturing will be simple,
This will be the texture for half of my model.
Using wood means, that i will have to use fewer colours such as different shades of Brown and orange.
Here the wood can be used for walls, logs, the walkway and the beam at the top of the house.
Stone Foundation:
For the base of my model, it will be a stone foundation, this means that it will have to have jagged edges and rough surfaces.
The texturing will be bland and have very few colours to it, as well as the colour will have to be rough.
Thatch Roof:
The thatch roof will be fairly simple, the colour scheme i will be using will consist of lighter shades of brown.
Asset breakdown:
The logs will be made of a cylinder and will have a wood like texture.
The stone base will be made from a cube that will be scaled down and scaled up length ways as well as to extrude the bottom downwards to create the foundation of the lodge.
the roof will be a cube, scaled down and folded in the middle and put over the top of the lodge.
Time estimation:
The logs will take about 20 mins to do all of them and about 30 mins to UV and 1 hour to texture them.
The stone foundation will take 20 mins to model, 1 hour to UV and 2 hours to texture.
The roof will take 1 hour to model and 1 hour to UV both sides and 2 hours to texture both sides with thatch textures.
What is 3D modelling:
3D modelling is the process to create a 3D mesh to be put into a game or TV, 3D software generates models through:
1.) Simple polygons
2.) 3D primitives, Cubes, Cylinders or Spheres
3.) Curves
4.) NURBS
Once you finish your 3D model, you can begin to UV it, UVing can be difficult but to UV, you select what you want to UV and select the UV editor and unwrap/unfold your model, this allows you to put a "texture map" on it, this means you can put graphics onto your model, this can be a photograph or hand painted on Photoshop.
How is modelling for games different from modelling for films:
Firstly in games there is a polygon budget however in films/CGI there is not really any limit to this.
Poly-count break, is the amount of polygons that can be put into a single model, this has increased through the generations of consoles: PlayStation - PlayStation 4 for each generation the Poly count has greatly increased each time which means the models can look bigger and better, but for films it takes an average of 29 hours to render a single frame for animated films like "Monsters University" even though the graphics in games will always have limitations, films will not.
Hard Surface/Organic Modelling:
Hard Surface models are anything that is a machine or man made for example a helicopter or a computer however Organic models are the opposite, these are anything with flowing faces, Organic models will have smoother and more flowing shapes and few hard edges but for hard surface modelling there will be more hard edges
This helmet has very few flowing shapes and quite a lot of hard edges.
But not all man made models come under Hard surface models, for example a couch has smooth faces and is a organic model.
Environment Modelling:
Environment modelling is about assessing the environment you want to model and doing a breakdown of what there is and what your priming aim will be to model,
Modular Modelling:
Modular modelling is the use of "interchangeable components" in a model, for example a brick, you can make many different things with bricks.
Unique Modelling:
Unique modelling is the opposite to modular modelling, it is where you have a shape that cant be used to make other things.
High Poly/Low poly modelling:
Low poly is a polygon mesh that has a small poly count these occur in games and contrast with high poly, this is used in games as well as films/animations.
The appearance of a low poly model appears blocky.
High poly is the opposite of this, where there are a lot of polygons, this means the model/mesh will have a lot more detail
and this makes it more life like.
Different modelling software:
Maya
3Ds Max
DAZ Studio
Modo
ZBrush
3D Modelling Terminology:
Polygon Geometry:
polygons are used in all types of objects.
NURBS Surfaces:
NURBS stand for non-uniform rational b-spline, NURBS are commonly used for smoother objects that polygons cant be used for.
Subdivision Surfaces:
Subdivision are sometimes referred as NURMS, these are like polygonal geometry.
Beveling:
Beveling is a process where you turn an edge into a face so you can have a rounded corner instead of a sharp edge.
Pivot Point:
The pivot point is the point on a 3D object where you can rotate, scale or move it on the axis, the pivot point can be moved around where ever you want it to be, for example if the pivot point is on a door hinge the door will turn like it was a real door.
Target Meshes
1.) Select that target object in the scene view.
2.) Remove the object from the list of target meshes.
3.) use the target object as a search envelope
This is the Medieval lodge that i want to model.
I encountered many problems while doing this and the main problem was the roof

This is the UV space, to UV properly you have to fit as much as you can into a 0 to 1 space, the smaller the UV within the space, the more stretched it will become.
Here i spaced out the UVs that will be saw more then others
The texture i am doing is a wood texture, to simulate the look of a medieval lodge.
the colours i used for the texture were 2 darker shades of brown.
Here are my swatches, the 3 shades of brown at the start of the recent colours were the 3 i used to make my wood texture.
Here is the wood textured and done as well as, a bit of the roof textured, the roof will textured like thatch.
This what i want my thatch roof to resemble this pattern/design, i can still sue the 3 colours on the thatch roof like my wood texture but i will have to keep it lighter then the wood further more, the texture will look a little like hair.
Once i apply the texture, it adds a light reflection to it, this occurs because i added a Blinn, Blinn adds lighting to your texture,
Here i have added my roof texture, i made it look like a thatch roof, the problems i had with this is trying to get it as thin as possible with the right colours to make it look like thatch.
I added my textures on my log, i used a different colour scheme to everything else, the colour i mainly used was a dark shade of brown with a low opacity red shade.

This is my model with the six foot man, with full textures,
Evaluation :
The requirements for this project was
about the process of making a model, UV'ing it and texturing it,
My 2D concept was a medieval lodge with this idea i had to think
of what it would look like and what shapes i would have to use.
I came up with this idea by looking
through pintrest and having a look at environment assets so I found a medieval lodge
so I decided to make my own version of it, I made a couple of sample structures
to get with the design process to ready myself for the final design, I did
research on medieval structures, what materials they used to make their
structures and break them down into the finer pieces to get a better
understanding of how to model, this was easy because I just had to research the
materials they used in there structures.
Once I started modelling the final piece, I
blocked it out with basic shapes such as: Cubes, Cuboids and Cylinders once I did
this, I could start going into finer detail on the model with the stones paths
to the wooden foundations, this was fairly difficult because I had to be quite precise
with the wooden supports but with the stone paths it was easy because all I had
to do was to put them around the lodge, I enjoyed modelling the lodge because I
wanted to see what the final outcome would be, the problems that occurred while
doing this were some of the faces on the stone pathway would not bridge across so
there would be a drop in-between the pathway as well as making the roof was a
pain because of the shape of it, the roof was slightly slanted on each face so
it messed up the vertex and made it go inside it self but eventually I fixed it
and it came out how I wanted it too.
Lastly, after I made the model and added
all of the detail I needed too, I had to UV it this was the most difficult
point in the process I had to do because I was not as experienced as my peers
on UV’ing but the process I did was to separate the model into 3 pieces: Main
building, roof and the logs, doing this made it neater and a lot easier furthermore,
I started on the main body, I unfolded each wall once I did that I used the UV
snapshot to take it into Photoshop to texture it so I can take it back into
Maya, while texturing I looked back to my research where what the structures
were made of, so I made a colour pallet to texture it like wood, once I did
that I began to UV the Roof and logs, the textures for these I looked back to
my notes and found colour pallets for a log and thatch, the log was the most
difficult because it was more different compared to the wood and thatch textures.
I’m happy with my model because I was able
to complete all the processes on a basic level, this means that the model had
basic textures and complete UVs.




No comments:
Post a Comment